



How To Use an Immersion Blender for Soup (Without the Splatter)
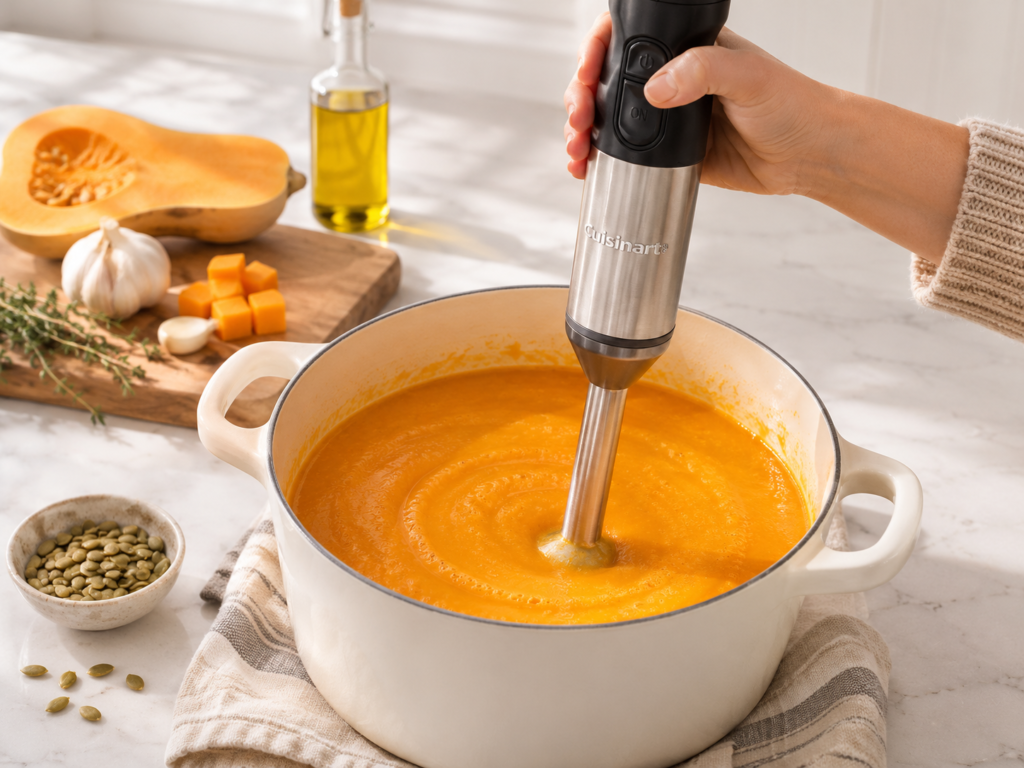
Using an immersion blender for soup comes down to three things: enough liquid, a submerged blade, and knowing when to stop. Get those right and a pot of cooked vegetables turns smooth and creamy without ever leaving the pot.
One less appliance to wash, too.
An immersion blender (also called a stick blender or hand blender) purees soup directly in the pot. It’s most useful for vegetable soups, where roasted cauliflower, butternut squash, tomatoes and potatoes turn creamy once they’re fully cooked and blended.
There is a technique to it. Lift the blender out while it’s running and you’ll be cleaning soup off the backsplash. Here’s how to use one, skip the splatter, and get the texture you want.
This post contains affiliate links. If you buy through them, Reach Wellth may earn a small commission, at no extra cost to you.
What Is An Immersion Blender?
An immersion blender is a handheld appliance with a spinning blade inside a protective guard at the end of a long shaft. Instead of pouring ingredients into a pitcher, you put the blender into the food.
That makes it ideal for soups, sauces and purees. You cook, blend, adjust the consistency and serve from the same pot. Most models have one or more speeds, and some come with whisk or chopper attachments; for soup, you only need the standard blending shaft.
A corded, variable-speed model like the KitchenAid immersion blender or the Cuisinart stick hand blender handles everyday soup easily.
Why Use An Immersion Blender For Soup?
You blend directly in the pot
Transferring hot soup to a blender is the least enjoyable part of making pureed soup: working in batches, managing the heat, pouring it all back, then washing the blender. An immersion blender skips most of that. Once the vegetables are tender, take the pot off the heat, check the broth level and blend.
You control the texture
Not every soup needs to be perfectly smooth. Stop when the vegetables are partly broken down, or keep going until the soup is creamy. A butternut squash soup might be best fully smooth, while a potato soup can keep some texture.
It makes creamy soup without heavy cream
Fully cooked vegetables plus the right amount of broth make a thick, creamy soup on their own. Butternut squash, cauliflower and potatoes are especially good at adding body as they break down.
Cleanup is easier
Instead of a pitcher, lid and blade assembly, you rinse one attachment. That matters most when you’re already cleaning up after dinner.
How To Use An Immersion Blender For Soup
The technique is simple, but the order matters.
Step 1: Cook the vegetables until completely tender
An immersion blender isn’t a substitute for cooking. Firm vegetables blend unevenly. For roasted vegetable soup, roast until fork-tender; for stovetop soup, simmer until the vegetables break apart easily with a spoon.
Remove bones, bay leaves, woody herb stems and anything else that shouldn’t go through the blade.
Step 2: Take the pot off the heat
Turn off the burner and move the pot to a stable, heat-safe surface. Even if your blender is rated for hot ingredients, there’s no reason to blend soup while it’s boiling. Let it stop bubbling and cool as your manual directs, since temperature limits vary by model.
Step 3: Make sure there’s enough liquid
The soup needs enough liquid to cover the blade guard. If the vegetables are piled high with little broth, add a bit more first. You’re not making it watery, just giving the blade room to circulate.
Use a deep pot with plenty of space above the soup. A tall 7-quart enameled Dutch oven keeps a full batch contained. If your batch is too shallow to cover the blade, move it to a narrower heat-safe container instead of blending at the surface.
Step 4: Submerge the blender before turning it on
This step prevents most splattering. Lower the blending head into the soup before you press the power button, with the entire blade guard below the surface.
Don’t submerge the motor housing or go past your model’s maximum immersion depth. Hold the blender securely, slightly above the bottom of the pot.
Step 5: Start on low speed
Begin at the lowest speed and hold steady while the vegetables start to break down. Full power from the start throws soup around, especially when the mixture is thick or chunky. Once it’s moving smoothly, increase the speed if needed.
Step 6: Move the blender slowly
Glide the blender around the pot with the guard submerged. A slight angle helps circulate the soup and reach the edges. Don’t drag the guard across the bottom, especially in nonstick cookware, and skip the aggressive pumping; the blade does the work.
Step 7: Stop blending before lifting it out
When the soup reaches the consistency you want, release the button and wait until the blade stops completely. Only then lift the blender out. Lifting a running blender above the surface is how soup ends up on the backsplash.
Step 8: Adjust the consistency and seasoning
If the soup is too thick, stir in warm broth. If it’s too thin, simmer it uncovered to reduce. Then taste before adding salt, herbs or acid. Blending fixes the texture; seasoning is what makes it taste finished.
How To Use An Immersion Blender Without Splattering
If an immersion blender has ever made a mess of your kitchen, one of these was probably the reason.
Keep the blade guard completely submerged. This is the rule that matters most. If the blade breaks the surface while it’s running, it flings soup out of the pot.
Use a deep enough pot. A wide
Start slowly. High speed isn’t automatically better. Start low, let the big pieces break down, then speed up once the soup moves smoothly.
Don’t lift the blender while it’s running. It seems obvious until you’re chasing the last few chunks around the pot. Stop the motor, reposition, submerge, and continue. It’s faster than cleaning the stove.
Watch for suction. Sometimes the blending head grips the bottom of the pot. Don’t yank it while it’s running. Stop, let the blade stop, reposition slightly above the bottom and restart. A slight angle helps prevent it.
Can You Use An Immersion Blender In Hot Soup?
Yes, if your specific immersion blender is approved for hot liquids. Many are designed to puree warm soup right in the pot, but the manufacturer’s instructions always come first.
- Take the pot off the heat, and never blend soup that’s actively boiling.
- Let the soup cool as your manual directs.
- Keep the blade guard submerged and start on low.
- Use a pot deep enough to contain the soup, and stay within the recommended immersion depth.
- Keep your hands away from the blade. If food gets stuck, turn the blender off and unplug it before clearing it.
If your blender isn’t rated for hot ingredients, let the soup cool to the temperature its manual allows.
Immersion Blender vs. Countertop Blender For Soup
Both make smooth soup. Each has its strengths.
| Feature | Immersion blender | Countertop blender |
|---|---|---|
| Blends directly in the pot | Yes | No |
| Cleanup | Usually easier | More parts to wash |
| Very smooth texture | Good, depending on model | Often smoother |
| Partial blending | Easy to control | Less convenient |
| Large batches | Easy in a deep pot | Often needs batches |
| Hot soup | Only if the model allows | Only if the model allows |
When an immersion blender is better
Reach for it when convenience matters most: weeknight soups, sauces, and recipes where a slightly rustic texture is fine. It’s also the easy way to blend part of a soup and leave some vegetables whole.
When a countertop blender is better
Tomato skins, roasted pepper skins and fibrous vegetables can leave small bits behind with a handheld model. A high-powered countertop blender like the Ninja Professional Plus breaks them down more thoroughly. If you’re blending anything warm, use a blender approved for it and follow its filling, cooling and venting instructions.
For an everyday bowl of vegetable soup, though, the immersion blender is usually all you need.
How To Get a Creamier Soup With An Immersion Blender
Cook the vegetables thoroughly. If there are still chunks after blending, check whether the vegetables are actually tender before blaming the blender.
Add broth gradually. Too much broth makes soup thin no matter how well it’s blended. For thick soups like roasted butternut squash or cauliflower, a little broth goes a long way.
Blend in sections. Work your way around the pot so you’re not blending the same spot over and over. Check the edges and bottom for pieces you missed.
Don’t overblend potatoes. Potatoes turn gluey when worked too hard. In a potato-heavy soup, stop as soon as the texture is right.
Strain for a silky finish. For soups with tomato or pepper skins, pour the blended soup through a fine-mesh strainer. It’s an extra step, so save it for the recipes where silky really matters.
Common Immersion Blender Problems And How To Fix Them
My immersion blender is splattering
Make sure the blade guard is fully submerged. Use a deeper container, start on low, and don’t lift the blender while it’s running.
My soup is still chunky
Check that the vegetables are completely tender. If the mixture is too thick for the blade to circulate, add a little broth and blend again. If what’s left is skins or tough fibers, a countertop blender or a fine-mesh strainer will do better.
My immersion blender is sticking to the pot
That’s suction. Release the button, wait for the blade to stop, reposition slightly above the bottom and restart with the head submerged.
My soup is too thin
Simmer it uncovered to cook off some liquid, or blend in more cooked vegetables. Next time, start with less broth.
My soup is too thick
Add warm broth or water a little at a time, stirring between additions so you don’t overshoot.
My soup looks foamy
Blending pulls air into the soup. Avoid aggressive movement near the surface, let the soup rest a minute, then stir gently to settle the bubbles.
Easy Immersion Blender Soup Recipes
Once you have the technique, put it to work. These five roasted vegetable soup recipes all use the same roast-and-blend method, so you can practice on different vegetables and textures.
- Roasted butternut squash soup is the best place to start, since softened squash turns creamy almost immediately.
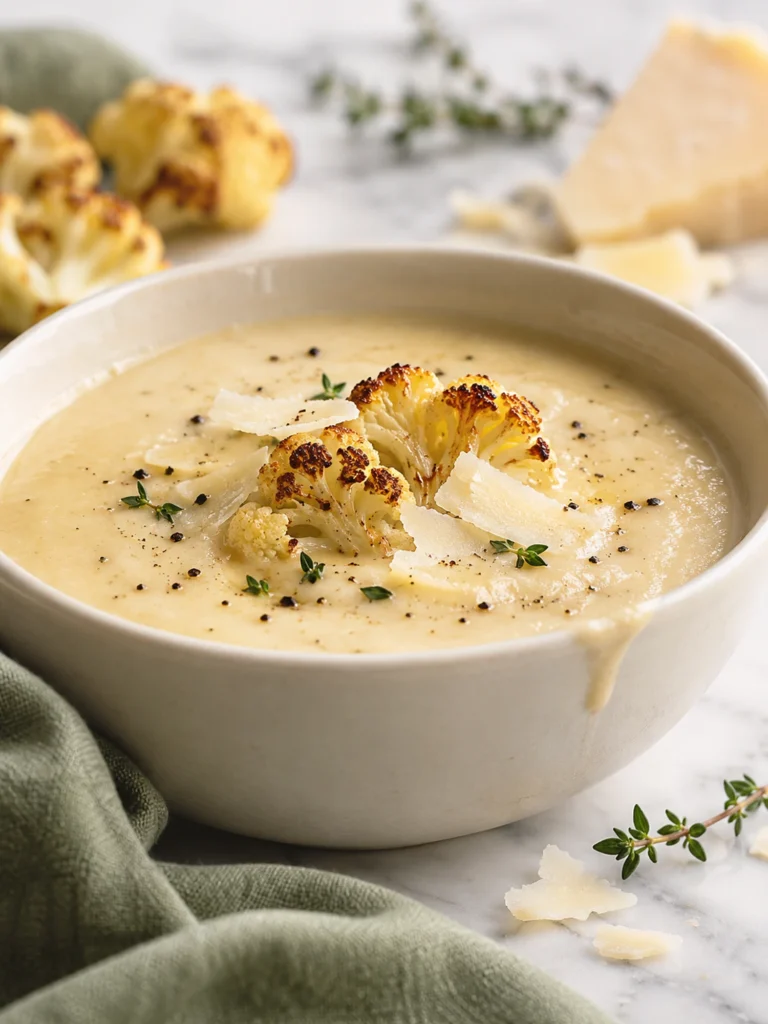
- Creamy roasted cauliflower soup is more savory, with a small potato for extra body.
- Roasted tomato soup and roasted red pepper soup show how a handheld blender deals with skins. Blend them as-is, or strain for a smoother finish.
- Sheet pan green goddess soup blends roasted broccoli and zucchini with spinach, peas and fresh herbs.
The method stays the same. The flavor changes with what goes into the oven and what you add after blending. For a copycat to try next, my Panera autumn squash soup is another blended soup that works well with a stick blender.
How To Clean An Immersion Blender
Easy cleanup is half the reason to own one.
- Turn the blender off and unplug it.
- Detach the blending shaft if your model allows it.
- Wash the shaft in warm, soapy water, taking care around the blade, then rinse and dry.
- Check your manual before putting any part in the dishwasher.
Never submerge the motor housing in water. And clean it right away; soup dried onto the blade guard takes much longer to scrub off.
FAQs
Can you use an immersion blender directly in a soup pot?
Yes. That’s its main advantage. Use a pot deep enough to keep the blade guard submerged, take it off the heat, and follow the manufacturer’s instructions for hot ingredients.
Do you have to cool soup before using an immersion blender?
It depends on the model. Many are designed for warm soup, but some have temperature limits. Check your manual, take the pot off the heat, and let the soup cool as instructed.
Why does my immersion blender splash soup everywhere?
The blade is probably too close to the surface, the speed is too high, or the container is too shallow. Keep the guard submerged, start slowly and use a deep pot.
How long should you immersion blend soup?
Until it reaches the consistency you want. Time depends on the batch size, how tender the vegetables are and the blender’s power. Blend in short bursts and stay within your model’s maximum continuous run time.
Is an immersion blender as good as a regular blender for soup?
For most everyday soups, yes. A countertop blender can get smoother, but an immersion blender is more convenient, easier to clean and blends right in the pot.
Can an immersion blender make soup creamy without cream?
Yes. Fully cooked squash, cauliflower and potatoes turn creamy when blended with the right amount of broth.
Can you use an immersion blender in a nonstick pot?
Check both the blender’s and the cookware’s instructions. Some blade guards are designed to protect cookware, but metal parts can still scratch nonstick if they scrape the bottom.
Can you use an immersion blender to puree only part of a soup?
Yes. Blend one section of the pot until creamy and leave the rest chunky. It’s an easy way to thicken the broth without turning the whole soup into puree.
What’s the difference between an immersion blender and a hand mixer?
An immersion blender has a spinning blade for pureeing. A hand mixer has beaters for batters and whipped cream. They aren’t interchangeable for soup.
One Less Appliance To Wash
An immersion blender isn’t complicated once you know the technique. Cook the vegetables until tender, add enough broth to cover the blade, keep it submerged, and start slow. That’s the whole thing.
No transferring hot soup, no batches, no giant pitcher to scrub. The same technique works for roasted cauliflower, butternut squash, tomato soup and any vegetable puree.
The best kitchen tools are the ones that remove steps instead of adding them. It’s the same reason an Instant Pot is worth having. Start with one of the roasted soups above and let the stick blender handle the rest.





Get the Weekly Wellth Newsletter
Stay up to date & receive the latest posts in your inbox.