



Snowflake Bread Recipe (Raspberry Christmas Wreath Bread)
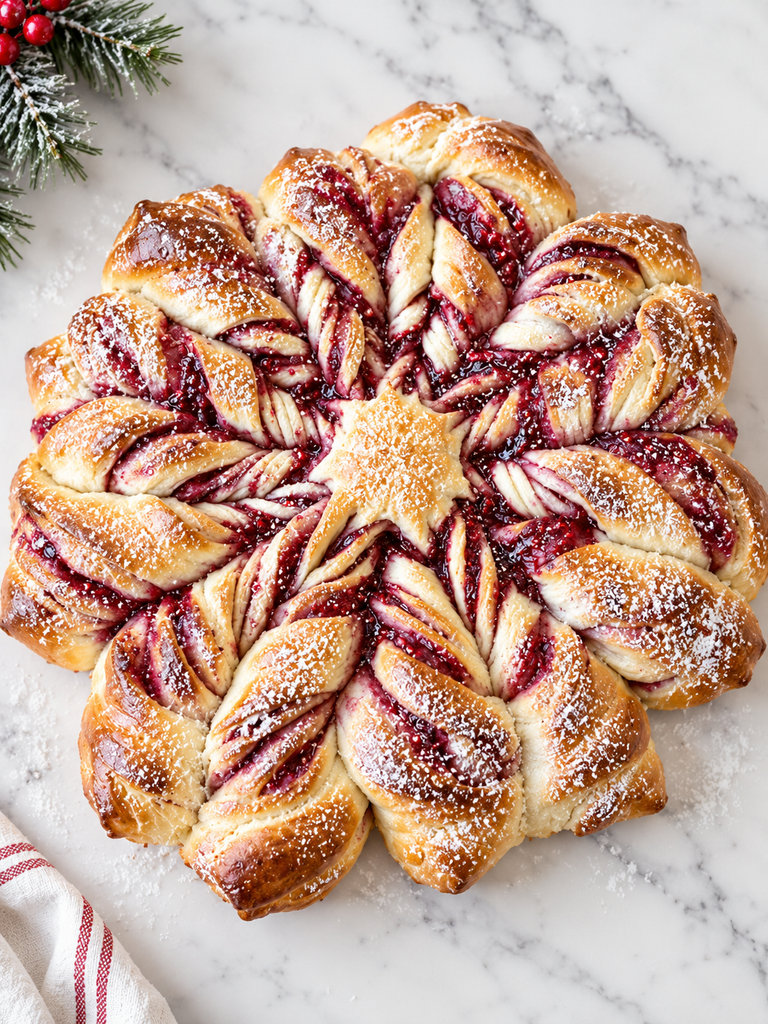
This snowflake bread recipe looks like something from a bakery case, but the shape is much easier than it appears.
Soft homemade yeast dough is layered with raspberry preserves, cut, twisted into a pull-apart snowflake and baked until golden. Finish it with a light glaze or a snowfall of powdered sugar, and you have a Christmas wreath bread that works as well for holiday brunch as it does for dessert.
I learned this technique at a Sur La Table holiday bread workshop, my first time making yeast dough from scratch. You don’t need the class to make it. Below is the full process, including the cut-and-twist shaping that gives snowflake bread its signature look.
Why This Snowflake Bread Recipe Works
It looks harder than it is
Most of the work is making a soft yeast dough and letting it rise. The snowflake effect comes from a few cuts and twists, not advanced pastry skills.
It doubles as a centerpiece
Set it in the middle of the table and a Christmas brunch instantly feels special. No extra decorating required.
It’s a pull-apart bread
Guests tear off individual sections instead of slicing a loaf, which makes it easy to serve a crowd.
The filling is flexible
Raspberry preserves are my favorite, but cinnamon sugar, chocolate hazelnut spread and other thick jams all work with the same method.
Part of it can be made ahead
The dough can be made the day before and refrigerated overnight, so the morning-of work is mostly shaping and baking.
What Is Snowflake Bread?
Snowflake bread is a layered yeast bread made by stacking thin rounds of dough with a filling between each layer, cutting the stack into sections and twisting those sections to create points.
You’ll also see it called star bread, pull-apart snowflake bread or holiday wreath bread. The names describe the same basic method; the finished shape just depends on how the points are pinched.
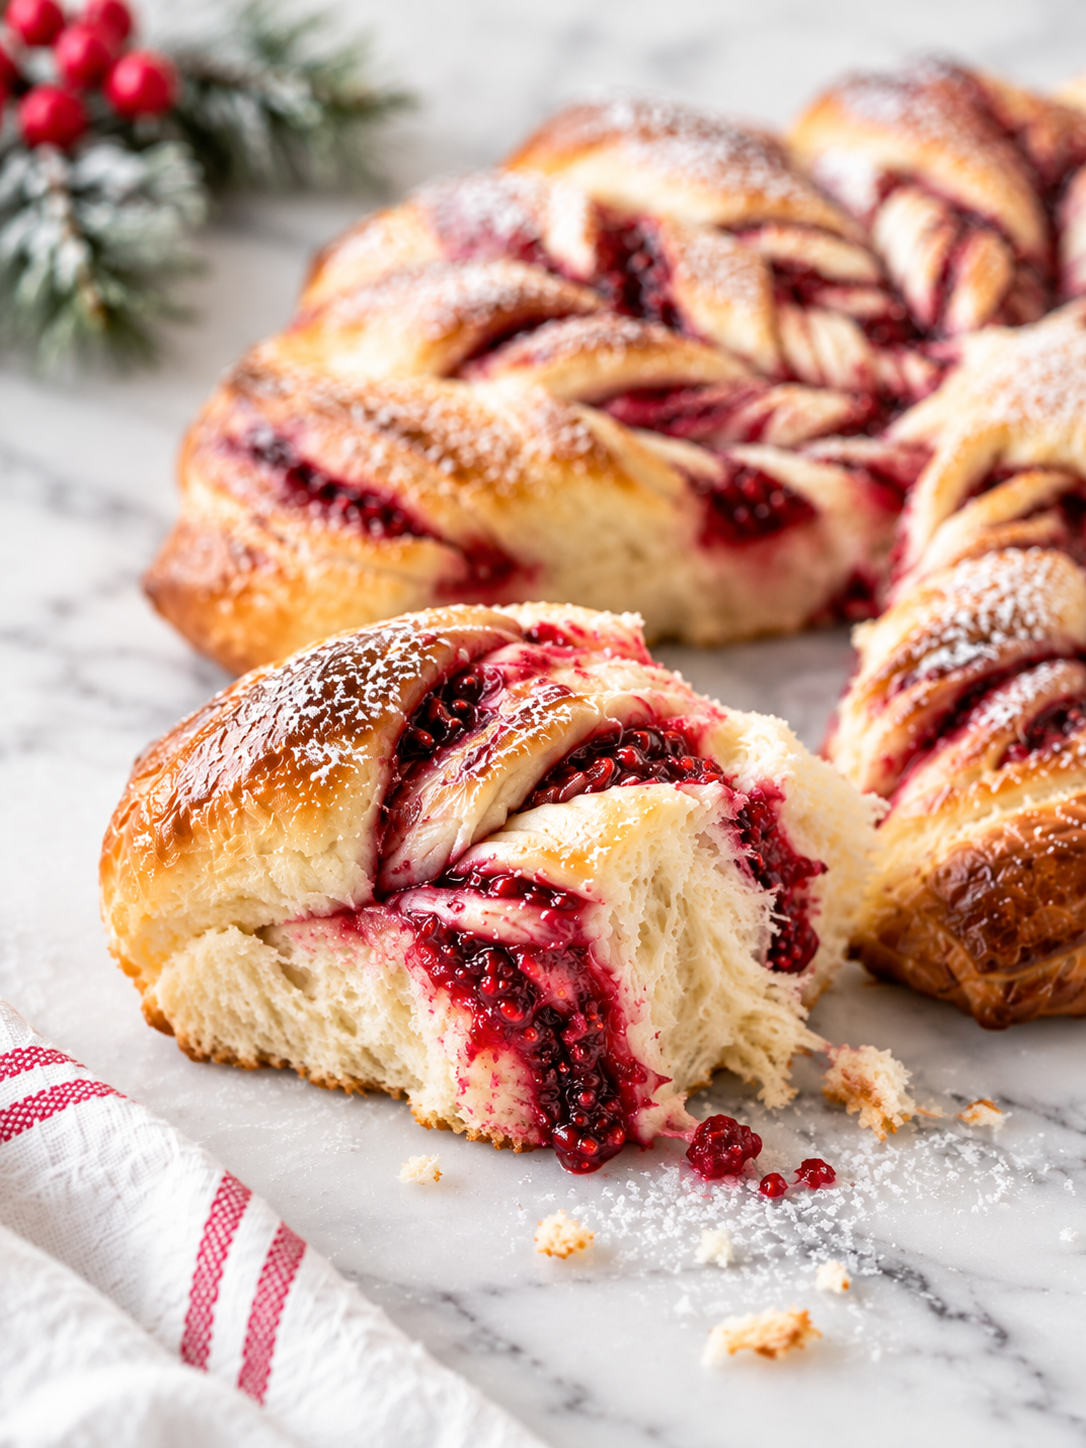
This version uses a soft, slightly sweet dough and a raspberry filling. Once twisted and baked, the red filling shows through every section, which is what makes it read as a Christmas bread without any extra decoration.
Snowflake Bread Ingredients
All-purpose flour
Regular all-purpose flour gives the dough enough structure to hold its twists while staying soft and tender.
Instant yeast
Instant yeast makes the dough reliable for first-time bread bakers. I keep a bag of SAF Red Instant Yeast in the freezer, and it’s what I reach for in any yeast recipe.
Warm water
Water around 100–110°F wakes the yeast up without harming it. If it feels comfortably warm on your wrist, you’re in the right range.
Eggs
Three eggs enrich the dough, making it softer and more golden than a basic bread dough.
Honey and sugar
A little honey and sugar feed the yeast and add a gentle sweetness that balances the tart raspberry filling.
Unsalted butter
Melted, cooled butter makes the dough tender. Let it cool before mixing so it doesn’t scramble the eggs.
Sea salt
Salt seasons the dough and keeps the sweetness from tasting flat.
Ground cardamom (optional)
The bread I made in class included cardamom, which adds a floral, citrusy note common in Scandinavian holiday breads. I prefer this bread a little sweeter and usually leave it out.
Raspberry preserves
Use a thick preserve rather than a loose, syrupy jam. Bonne Maman Raspberry Preserves are my pick here because they’re thick enough to stay put when you twist the dough.
Citrus zest (optional)
A little lemon or orange zest stirred into the preserves brightens the filling.
Egg wash
One egg whisked with a tablespoon of water gives the finished bread its glossy, golden color.
Glaze or powdered sugar
A simple milk, powdered sugar and lemon glaze adds sweetness. A dusting of powdered sugar alone gives a snowier finish and is my favorite for Christmas.
Tools That Make Snowflake Bread Easier
You don’t need specialized bread equipment for this recipe. These are the tools I got comfortable with in class and ended up buying for home.
Bench scraper
A bench scraper divides the dough, makes clean cuts for the snowflake sections and moves dough around without stretching it. It now comes out for cookies too.
Small offset spatula
A small offset spatula spreads preserves in a thin, even layer without digging into the soft dough.
Rolling pin
A tapered French rolling pin makes it easy to roll four even circles. It’s the same pin I use for sugar cookie cutouts.
Pastry brush
A silicone pastry brush applies egg wash evenly without tearing the twists.
Stand mixer
You can knead this dough by hand, but a KitchenAid Artisan stand mixer with the dough hook does the work in about the same time.

How To Make Snowflake Bread
Step 1: Activate the yeast
Combine the warm water, sugar and yeast. Let it sit for about 5 minutes, until foamy. Seeing the foam is how you know the yeast is working.
Step 2: Combine the wet ingredients
In a separate bowl, whisk the eggs, honey and cooled melted butter. Pour them into the yeast mixture and stir.
Step 3: Make and knead the dough
Whisk the flour, salt and cardamom, if using. Gradually add the wet mixture and work it into a dough. Knead for 5–7 minutes by hand or with a stand mixer’s dough hook, until smooth and elastic.
By hand, push the dough away with the heel of your palm, fold it back and repeat. Kneading is more about steady repetition than strength.
Step 4: Let the dough rise
Place the dough in a lightly oiled bowl, cover and let it rise for about 1 hour, until roughly doubled. In a cool kitchen, set the covered bowl in your turned-off oven with just the light on.
Step 5: Make the raspberry filling
Stir the preserves with citrus zest and sugar or cinnamon, if using. Plain preserves work fine too.
Step 6: Divide the dough
Turn the risen dough onto a lightly floured surface and divide it into four equal pieces with a bench scraper.
Step 7: Roll out four circles
Roll each piece into a circle about 10 inches across. Keeping them close in size matters more than making them perfectly round.
Step 8: Layer the dough and filling
Place the first circle on a parchment-lined baking sheet. Spread a thin layer of filling over it, leaving a small border. Repeat with the next two circles and top with the fourth, leaving the top layer bare.
Step 9: Cut the snowflake sections
Set a 2- to 3-inch glass in the center as a guide. Cut from the glass to the edge into 4 quarters, then cut each quarter into 4, for 16 sections. Remove the glass; the center stays intact.
Step 10: Twist the sections
Working with two neighboring sections at a time, twist them away from each other two full turns. The filling shows through as you go and the snowflake pattern starts to appear.
Step 11: Pinch the snowflake points
Pinch the ends of each twisted pair together to form a point. Continue around the bread until you have 8 points. They don’t need to match exactly; the dough puffs together as it rises and bakes.
Step 12: Let the shaped bread rise
Cover and let it rise for about 45 minutes. Meanwhile, heat the oven to 350°F.
Step 13: Egg wash and bake
Whisk one egg with one tablespoon of water and brush it over the exposed dough. Bake for 25–30 minutes, rotating the pan halfway, until deep golden.
Step 14: Glaze or dust
Let the bread cool slightly. Drizzle with the glaze, or dust with powdered sugar for a snowy finish.
Tips For the Perfect Snowflake Bread
Don’t rush either rise
The dough rises once before shaping and again after. Build both into your timeline; under-risen dough bakes up dense.
Keep the filling thin
Too much filling, especially a loose jam, squeezes out when you twist. You should still see dough through the filling in places.
Chill the dough if it gets soft
If the layers get sticky or hard to cut, slide the baking sheet into the fridge for 10 minutes. Firmer dough cuts and twists more cleanly.
Shape it on parchment
Assembling on the parchment-lined sheet means you never have to move the finished snowflake.
Check for doneness
The bread should be deep golden across the top and sound hollow when tapped underneath. An instant-read thermometer in the center should read about 190°F.
If you bake bread a few times a year, it’s worth having. I rounded up the prettiest colored kitchen appliances if you’re choosing a color.
Snowflake Bread Filling Variations
Once you know the shaping, the filling is easy to change.
Cinnamon snowflake bread
For a classic cinnamon-roll flavor, mix 4 tablespoons softened butter, ½ cup brown sugar and 1 tablespoon cinnamon. Divide it across the three filled layers. It’s the most crowd-friendly variation.
Chocolate hazelnut snowflake bread
Spread each layer with a thin coat of chocolate hazelnut spread, about ¾ cup total. It’s richer and closer to dessert, with the same flavor as the babka we made in class.
Other fruit preserves
Cherry, strawberry, blackberry, apricot and orange marmalade all work. Homemade chia seed strawberry jam works too, as long as it has set thick. If you like jam baked into dough, my homemade strawberry pop tarts are another good use for it.
Make-Ahead, Storage And Freezing
Making it ahead
Make the dough through Step 3, cover and refrigerate overnight. The next morning, let it sit until workable, then continue from Step 6. Cold dough may need extra time on the second rise.
Storing leftovers
Wrap leftover bread tightly in foil or plastic wrap and keep it at room temperature for up to 2 days. Warm individual pieces briefly before serving.
Freezing
Wrap the baked, unglazed bread well and freeze for up to 2 months. Thaw at room temperature, then add the glaze or powdered sugar.
Snowflake Bread FAQs
Is snowflake bread the same as star bread?
Yes, the terms describe the same layered, twisted bread. Depending on how the points are pinched, it can look more like a star, a snowflake or a wreath.
Is snowflake bread hard to make?
No. The yeast dough takes the most time because it rises twice. The shaping itself is a series of cuts and twists that becomes intuitive after the first pair.
What’s the difference between snowflake bread and Christmas wreath bread?
Christmas wreath bread is a broad term for any round holiday bread, including braided and ring-shaped loaves. Snowflake bread is one style of it, made by layering and twisting the dough.
What filling is best for snowflake bread?
Thick fillings work best: raspberry preserves, cinnamon sugar or chocolate hazelnut spread. Avoid thin jams that leak when you twist.
Can I leave out the cardamom?
Absolutely. It adds a floral, citrusy flavor, but the bread works without it. I prefer it without.
Why didn’t my bread rise?
Check that the yeast foamed in Step 1 and that the dough noticeably increased in size during the first rise. A cold kitchen can double the rise time.
What do you serve with Christmas snowflake bread?
It fits a holiday brunch alongside soft scrambled eggs with cottage cheese, Instant Pot egg bites or slow cooker cheesy grits. For drinks, a cranberry ginger beer mocktail or a good cup of coffee works well.
PrintSnowflake Bread (Raspberry Christmas Wreath Bread)
A soft, pull-apart snowflake bread made with layers of homemade yeast dough and raspberry filling, twisted into a Christmas wreath. It looks impressive but is easier to shape than it appears.
Ingredients
For the Dough
- 1¼ cups warm water (about 110°F)
- 1 tbsp instant yeast
- 1 tsp sugar
- 3 eggs
- 1 tbsp honey
- 4 tbsp unsalted butter, melted and cooled
- 4½ cups all-purpose flour
- 1 tbsp sea salt
- ½ tsp ground cardamom (optional)
- 1 tsp oil (for bowl)
- 1 egg + 1 tbsp water (for egg wash)
For the Filling
- 1 cup jam or filling of choice (raspberry, orange marmalade, or Nutella)
- Optional: zest of ½ lemon or orange
- Optional: 1 tbsp sugar or cinnamon for added sweetness
For the Glaze
- ½ cup milk or cream
- ½ cup powdered sugar
- 1 tsp lemon juice
Instructions
- Activate yeast: Mix warm water, sugar, and yeast. Let sit 5 minutes until foamy.
- Combine wet ingredients: Whisk eggs, honey, and butter; add to yeast mixture.
- Make dough: Mix flour, salt, and cardamom. Add wet mixture and knead 5–7 minutes until smooth and elastic.
- First rise: Place in oiled bowl, cover, and let rise about 1 hour or until doubled.
- Filling: Stir jam, zest, and sugar or cinnamon if using.
- Shape wreath: Divide dough into 4 pieces, roll each into a circle, layer with filling, and twist into a snowflake shape.
- Second rise: Cover and let rise 45 minutes.
- Bake: Brush with egg wash, bake at 350°F for 25–30 minutes, rotating halfway.
- Finish: Drizzle glaze or dust with powdered sugar.
Notes
Filling flexibility: The class used raspberry jam with a touch of cardamom, but any thick jam or chocolate spread works. Try orange marmalade, cherry preserves, or Nutella if you prefer something sweeter.
Cardamom is optional: The cardamom adds a floral, citrusy note — nice for a festive twist, but not necessary. I prefer the sweeter versions personally.
Timing matters: The dough needs time to rise twice — don’t rush it. You can make the dough ahead and refrigerate overnight if needed.
Twisting tip: To get clean, even twists, use a bench scraper instead of a knife — it keeps the edges tidy and helps move the dough without stretching it.
Proofing environment: A warm kitchen helps. If it’s cool where you are, place the dough in your oven with just the light on (no heat) to create a gentle proofing space.
Serving suggestion: Serve warm or at room temperature with coffee or tea. It’s just as good the next day lightly reheated.
Storage: Wrap tightly in foil or plastic wrap. Keeps on the counter for up to 2 days or freeze for up to 2 months.
Where I Learned To Make Snowflake Bread
I learned this bread at a three-hour Festive Bread Workshop at Sur La Table, my first cooking class there and my first time making dough from scratch.
Before that, yeast intimidated me. Words like proofing made bread baking sound technical and easy to ruin. Watching it happen in person changed that.
We made two breads that morning: this raspberry snowflake wreath, baked in class, and a chocolate hazelnut babka that proofed overnight and came home with me to bake the next day.
I went solo and shared a table with a woman who took classes regularly and a mom-and-daughter pair who were already comfortable with dough. I learned almost as much from watching them as from the recipe.
The instructor showed us how kneaded dough should feel, what properly proofed dough looks like and how to use a bench scraper and offset spatula without fighting the dough. The biggest surprise was the shaping. I assumed there had to be a complicated pastry technique behind it. There isn’t.
One practical note: Sur La Table offers a discount on in-store purchases the day you take a class, which is when I picked up most of the tools above.
If you’re considering a class yourself, my full Sur La Table cooking class review covers how the classes work, what they cost and what to expect. I also wrote about my Sur La Table macaron class if you’re deciding between class types.
Final Thoughts
This snowflake bread is the kind of holiday recipe I love: special enough for the center of the Christmas table, but far more approachable than it looks.
Give the dough time to rise, keep the raspberry layer thin and don’t overthink the twists. Once it’s in the oven, the sections puff together into a golden, pull-apart wreath, and suddenly you look like someone who makes elaborate holiday bread from scratch.
If you’re planning more holiday baking, my Christmas M&M cookies and white chocolate cranberry cookies round out a cookie tray, and cranberry crostini make an easy appetizer for the same gathering.




Get the Weekly Wellth Newsletter
Stay up to date & receive the latest posts in your inbox.